|
Sport, Xtreme and Hard Core:
Jack up the rear of the car and support with surdy jack stands, be careful.
Remove the rear wheels and the inner fender panels from the wheel well
by removing the 4 screws if you have a first generation Miata or the 4
plastic fasteners if your car is a 1999 - 2005 model.
Move the seats all the way forward. Remove the quarter trim behind the
seats and roll back the carpet to expose the 3 bolts that attach the lower
roll bar foot plates. Also pull back the carpet and insulation at the
front of the door opening to expose the floor pan. Remove the 3 roll bar
mounting bolts and insert the door bar as seen in Photo 1. From the wheel
opening make sure the back-up plate is still in place, insert the bolts
and snug but do not tighten the bolts. The forward foot plates should be
as far outboard as possible and still clear the door panel. Check the
clearance between the door bar and door panel by closing the door. Once
you have checked the door panel clearance, drill through the front plate
using a 3/8" drill, install the bolts w/ washers from the top and the
back-up plates w/ self locking nuts from underneath. Torque all of the
bolts to 33 ft/lbs (front & rear).
Trim the carpet, reintstall the quarter trim panels and you are ready
to go.
Ace, Deuce and Hard Bar:
The installation is the same as with the other roll bars except you do
not have the lower mounting plates on your bar or the backup plates that
go along with them.
Measure down 5" from the edge of the bulkhead just in front of the
seat belt reel and in 1" from the structure behind the door jamb.
Center punch and drill a 3/8" hole. Put a door bar in place by inserting
the welded bolt through the hole and check clearances for the seat and
door panel. Drill the other mounting holes through the plate when you
are happy with the placement and install the rear backup plate with the
supplied bolts, washers and nuts. Snug but do not tighten the bolts until
all of the bolts are in place.
Follow the instructions above for mounting the front plates and torque
the nuts to 33 ft/lbs.

Photo 1 - Rear Door Bar Plate
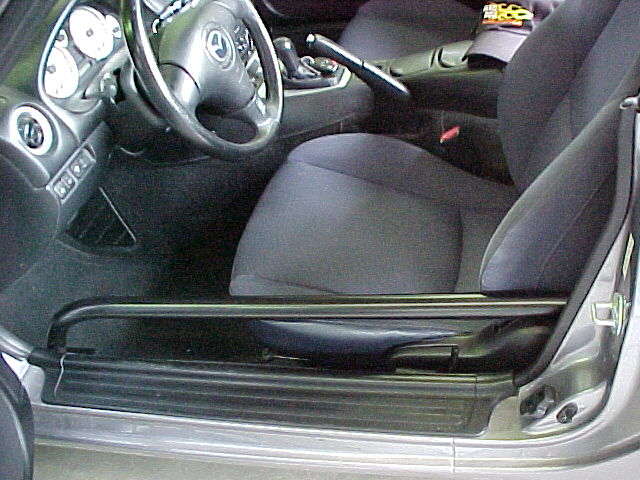
Bolt-in Door Bar Installed
Updated
July 15, 2010 10:24 AM
|


;)
;)